|
Paper Plate Education
"Serving the Universe on a Paper
Plate"
Video Excerpts: Altitude Measurer
The following pictures and narration are excerpted from the Paper
Plate Astronomy video.
For this activity we will make an astrolabe-like device
for measuring (in degrees) the altitude of
celestial objects up from the horizon.
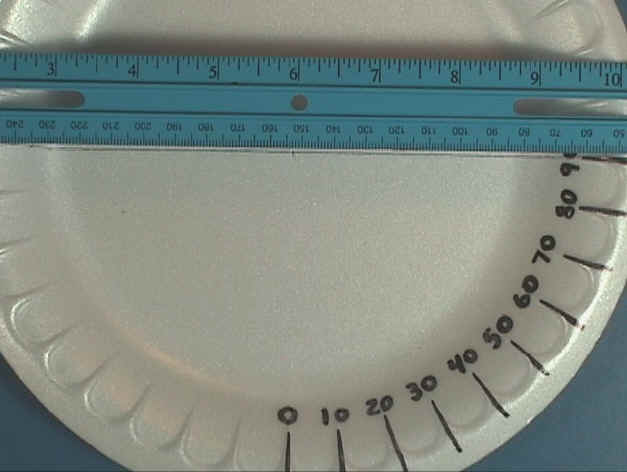
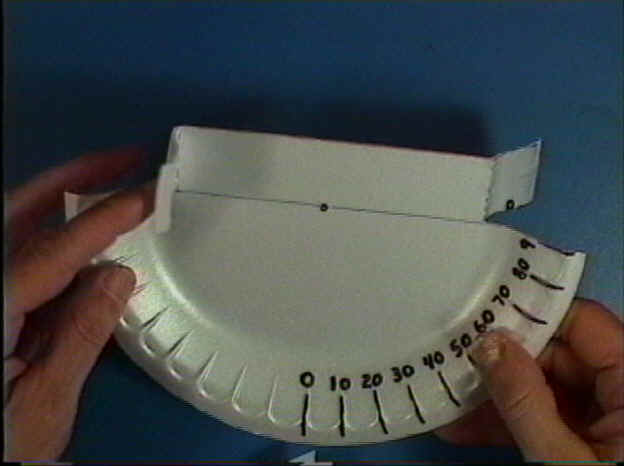
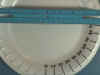 Using a foam plate with 36 scallops around the perimeter,
mark and label ten degree increments from zero through 90. Using a foam plate with 36 scallops around the perimeter,
mark and label ten degree increments from zero through 90.
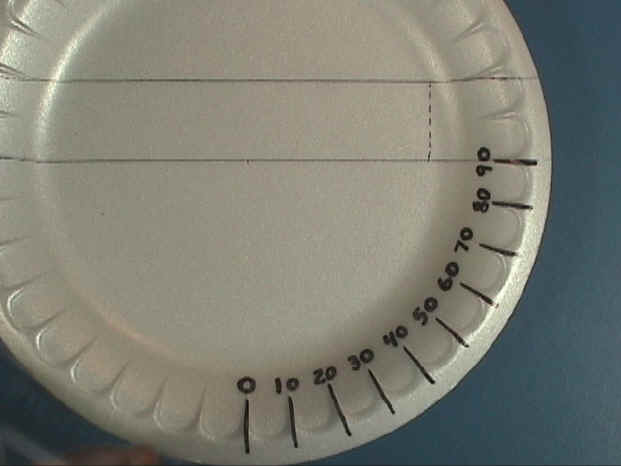
 From the 90, draw a line across the diameter of the plate. From the 90, draw a line across the diameter of the plate.
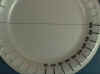
 Place a straight edge along the diameter and draw another
line parallel to and above the diameter. Place a straight edge along the diameter and draw another
line parallel to and above the diameter.
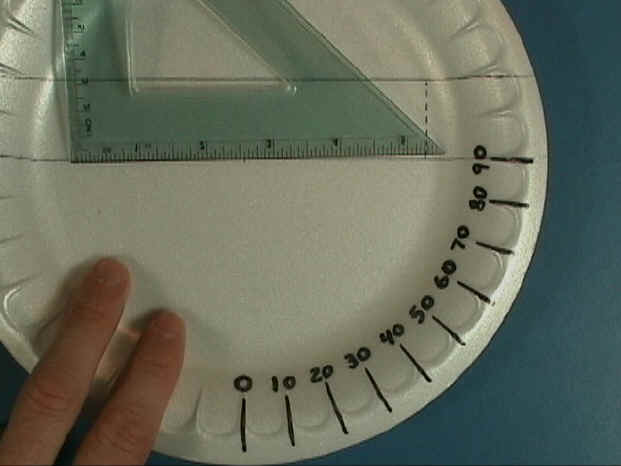
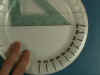 As shown here, on the flat part of the plate in from each
edge draw two perpendicular lines between the horizontal lines. As shown here, on the flat part of the plate in from each
edge draw two perpendicular lines between the horizontal lines.
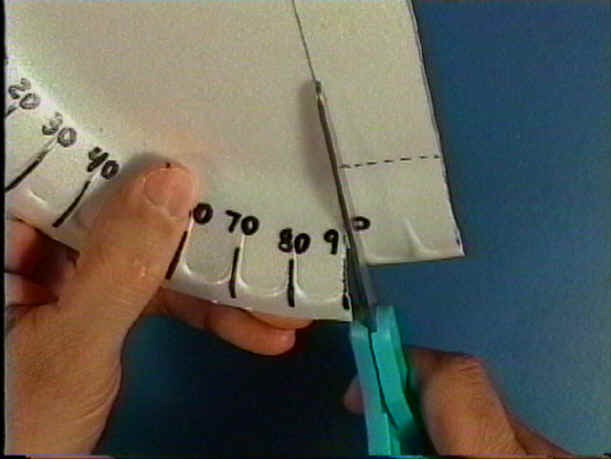
Neatly cut across the plate along the upper line.
 Then cut in along the diameter as far as the short line
you just drew... And repeat that on the other side. Then cut in along the diameter as far as the short line
you just drew... And repeat that on the other side.
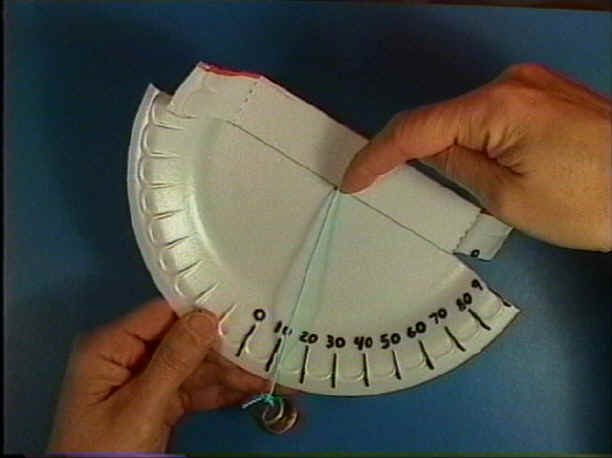
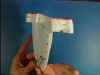
Score the perpendicular line from the horizon up to the
top edge...and bend the tab back one way.
 Repeat that on the BACK side of the other edged of the
plate and bend that tab back the opposite way. Repeat that on the BACK side of the other edged of the
plate and bend that tab back the opposite way.
For clarity we put red lines along the top of our viewing
sights.
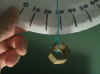
 From the center of the
plate, midway along the diameter line, suspend a weight from string. From the center of the
plate, midway along the diameter line, suspend a weight from string.
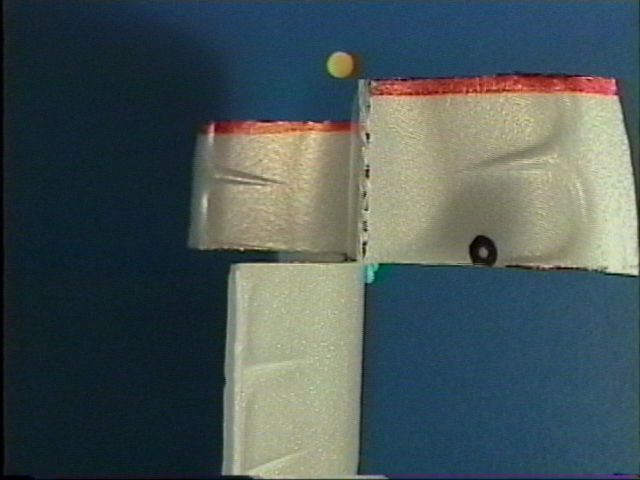
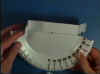
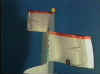
 When using the altitude measurer to sight a star, the
plate can not appear open. Rather,
the sides of the plate are unseen and the two gun sights should be side by side. When using the altitude measurer to sight a star, the
plate can not appear open. Rather,
the sides of the plate are unseen and the two gun sights should be side by side.
 If the near gunsight is lower, then you are aiming too
high... If the near gunsight is lower, then you are aiming too
high...
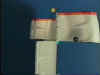 If the
distant gunsight is lower, then you are aiming too low... If the
distant gunsight is lower, then you are aiming too low...
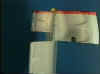 They should align together with the target visible along the edge of the
plate
They should align together with the target visible along the edge of the
plate
Though the targeted celestial object shown here looks like the sun, you
must never use this device to view the sun directly.
Eye damage can result.
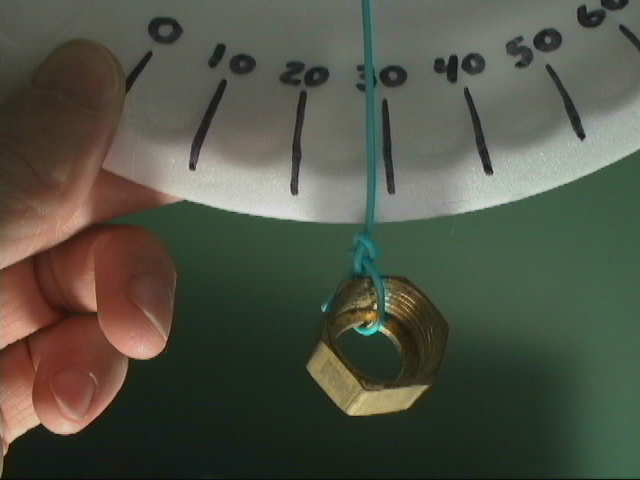
 Have a partner read the angular measurement off the
front of the plate. Have a partner read the angular measurement off the
front of the plate.
|